

Content
# Runyte
[](https://github.com/runyte/runyte/actions/workflows/ci.yml)
[](context/reference/test-coverage.md)
https://github.com/user-attachments/assets/5f039873-8232-4ad9-b089-0d54b2b05e85
*[Watch the 45-second demo](https://runyte.com/videos/runyte-demo.mp4?v=7b63a9df8e582e64): editing, terminals, Markdown, persistent sessions, and the desktop window with animated images, PDFs, and pane dragging.*
Runyte is a fast modal text editor for focused work. Everything is accessed
through keybindings. No need to remember them though — every keybinding sequence
shows hints with possible completions.
Runyte can do **quite a lot**:
- multipane text editing with aligned indentation and language/file overrides
- terminal multiplexing
- file browsing and management
- Git, including reviewed merges, conflict resolution, branch/worktree
management, and a cached commit network
- fuzzy finding across all files, terminals, and buffers
- plugins written in any language
- LSP support (code analysis, formatting, jumping between functions and variables)
- Tree-sitter support for 31 languages
- three modes: `ide` for a project, `ide+mux` to attach and detach while terminals keep running and unsaved buffers wait, and `editor` (`runed`) for quick edits anywhere
- word completion based on text from all open buffers
- smart file path completion (searching from current buffer and from project dir)
It also has features that make it **pleasant to work with AI agents** — managing
several at once and keeping up with their output:
- Git worktree support and fast switching
- built-in [MCP server](docs/mcp.md) for sharing buffer and terminal contents with agents: `runyte mcp --identity <name>`
- `Ctrl-g` in Claude Code or Codex attaches to the parent Runyte instance, instead of running a new one
(after [setting `EDITOR`](#post-install-setup))
- Markdown formatting with `?`, including wide tables
- Image pasting with `Ctrl-v` or `Alt-v`
- Jump to any link with `gf` — works with file paths, Markdown links, web links (opens in a browser)
Having all of these features in a single binary enables strong code optimization,
consistent keybindings, consistent themes, and minimum configuration.
## Editions
Both editions use the same editor, keymap, configuration, plugins and persistent
sessions. Choose the desktop edition if you want `--window`; it also runs in a
terminal.
| Edition | Includes | Platforms | Installation |
| --- | --- | --- | --- |
| Terminal | Editor, terminal UI, Git, language services, integrated terminals, plugins and MCP | Linux, macOS, Windows 11 | [Install script, release archive or Cargo](#installation) |
| Desktop | Everything above, plus a window, native clipboard, image/PDF viewing and document preview | Linux and macOS | [Linux release archive or source build](INSTALLATION.md#desktop-edition) |
**Both distributions provide an executable named `runyte`.** The Cargo build
name `runyte-desktop` distinguishes the desktop executable in `target/`;
`runyte-native` is an internal library, not another program to install.
See [requirements and package names](INSTALLATION.md#choose-an-edition).
The platform table below describes the terminal edition.
| CPU | System | Automated tests | Prebuilt release | Hands-on use |
|--------|------------|:---------------:|:----------------:|:------------:|
| x86-64 | Linux | ✅ | ✅ | ✅ |
| ARM64 | Linux | ❌ | ✅ | ❌ |
| x86-64 | macOS | ❌ | ✅ | ❌ |
| ARM64 | macOS | ✅ | ✅ | ✅ |
| x86-64 | Windows 11 | ✅ | ✅ | 🟡 |
| ARM64 | Windows 11 | ❌ | ❌ | ❌ |
🟡 Occasional hands-on testing.
This project is well tested. Test coverage is about 92% of lines, and CI requires at least 89%.
Every prebuilt release is built natively on its own platform and checked to start.
A few features are missing or work differently on Windows; see
[Windows support](docs/user-guide.md#windows-support).
Website: [runyte.com](https://runyte.com) ·
Documentation: [user guide](docs/user-guide.md) ·
Changelog: [GitHub Releases](https://github.com/runyte/runyte/releases) ·
Community: [r/runyte](https://www.reddit.com/r/runyte/)
## Screenshots
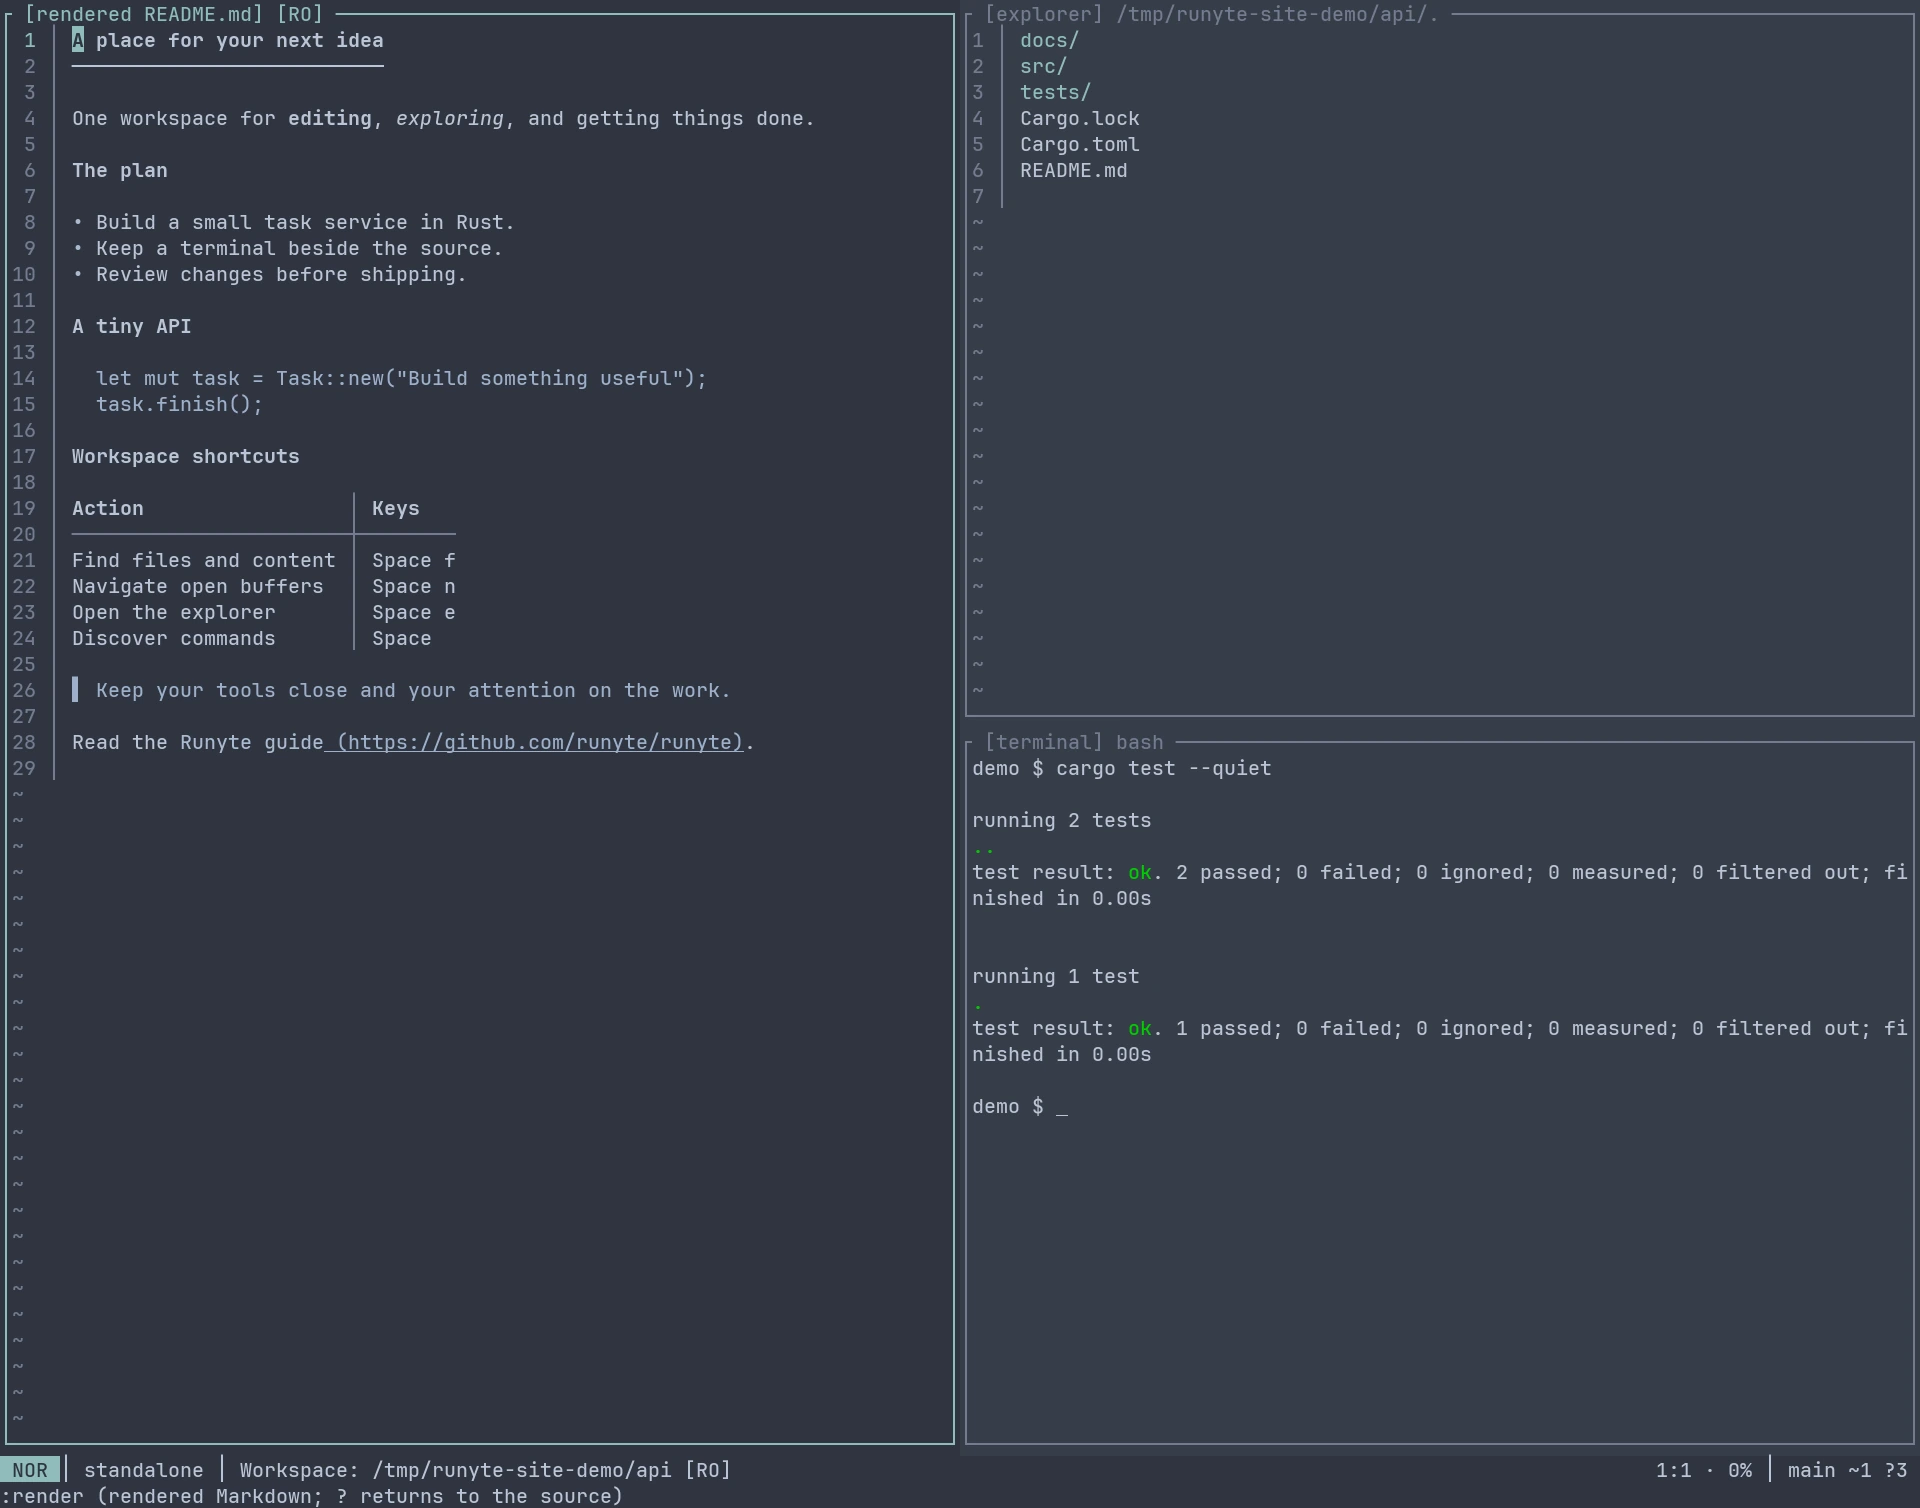
*Read Markdown as a page. Return to source. · nordbones-dark-soft*
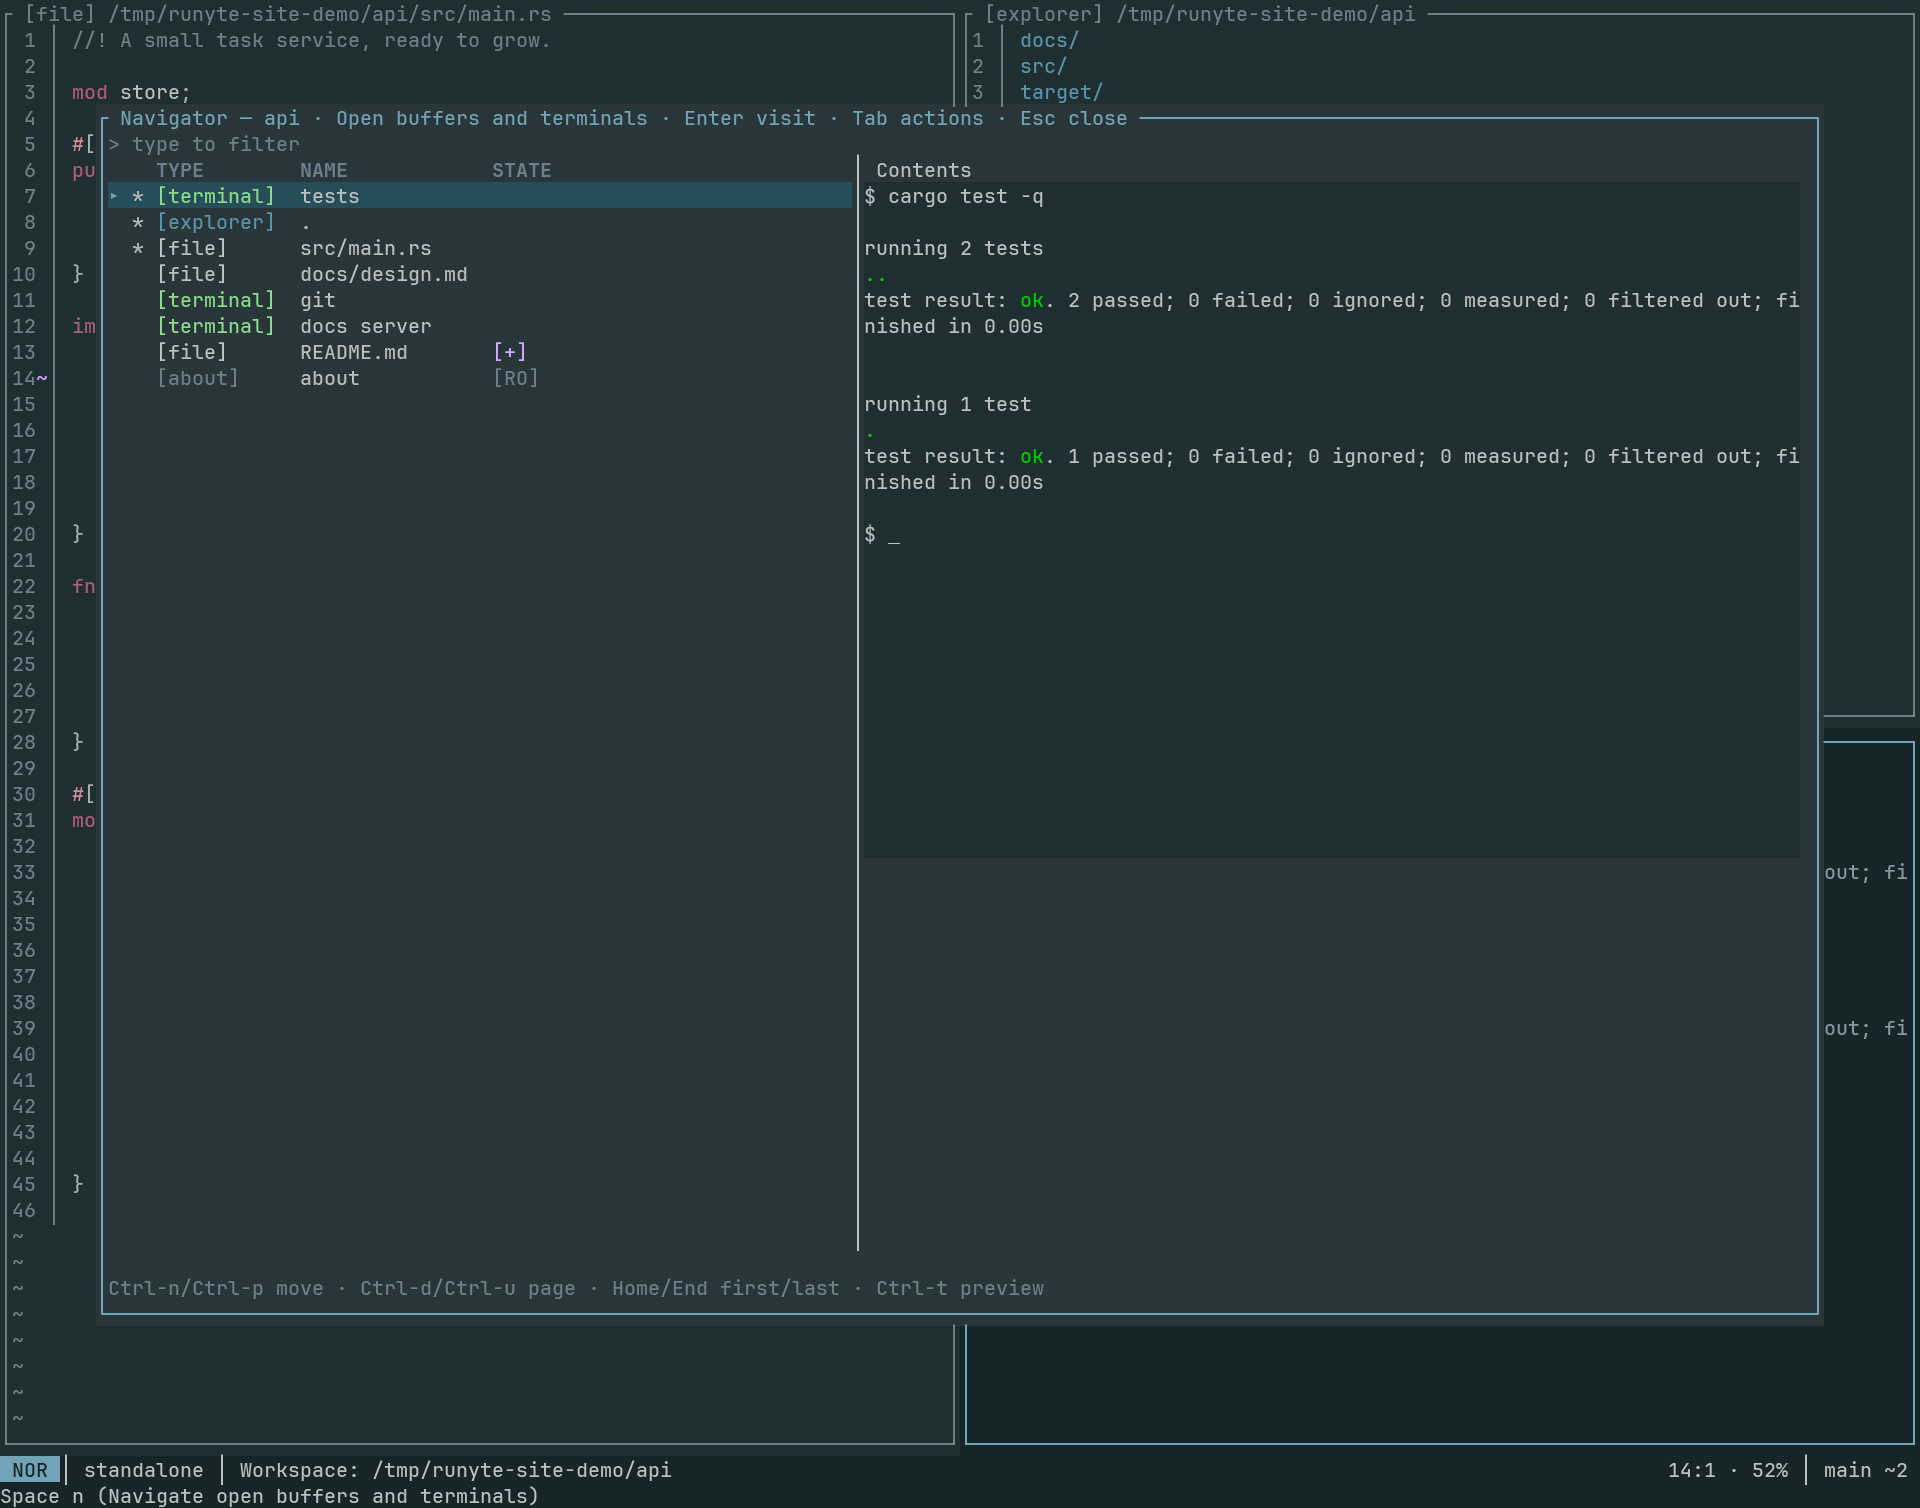
*Jump between open buffers and terminals. · terafox-soft*
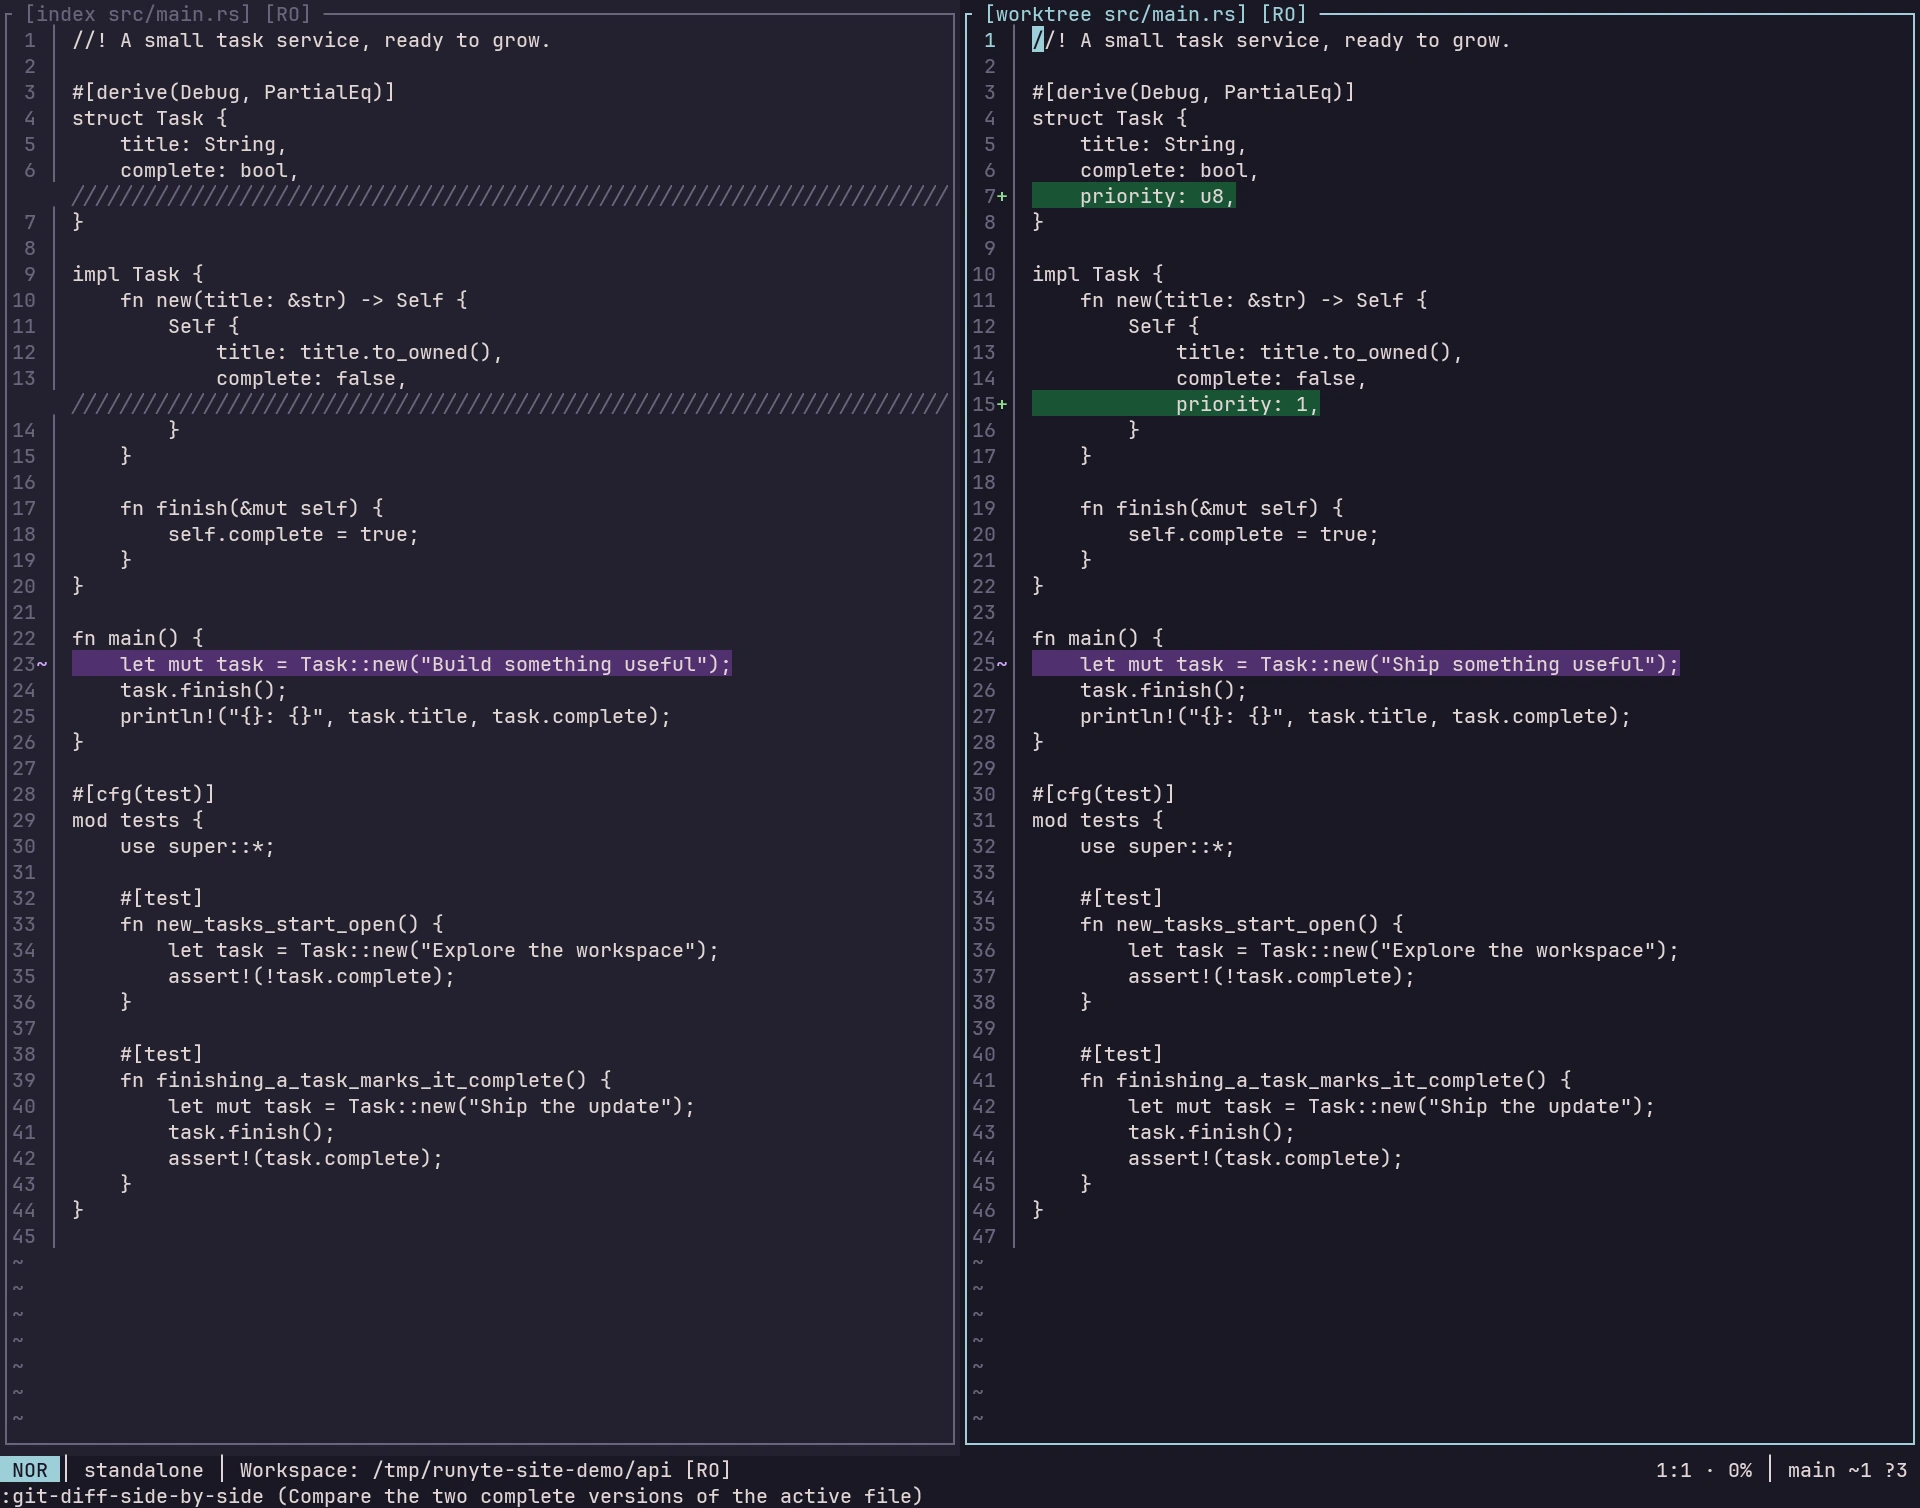
*Compare changes side by side. · rosebones-dark*
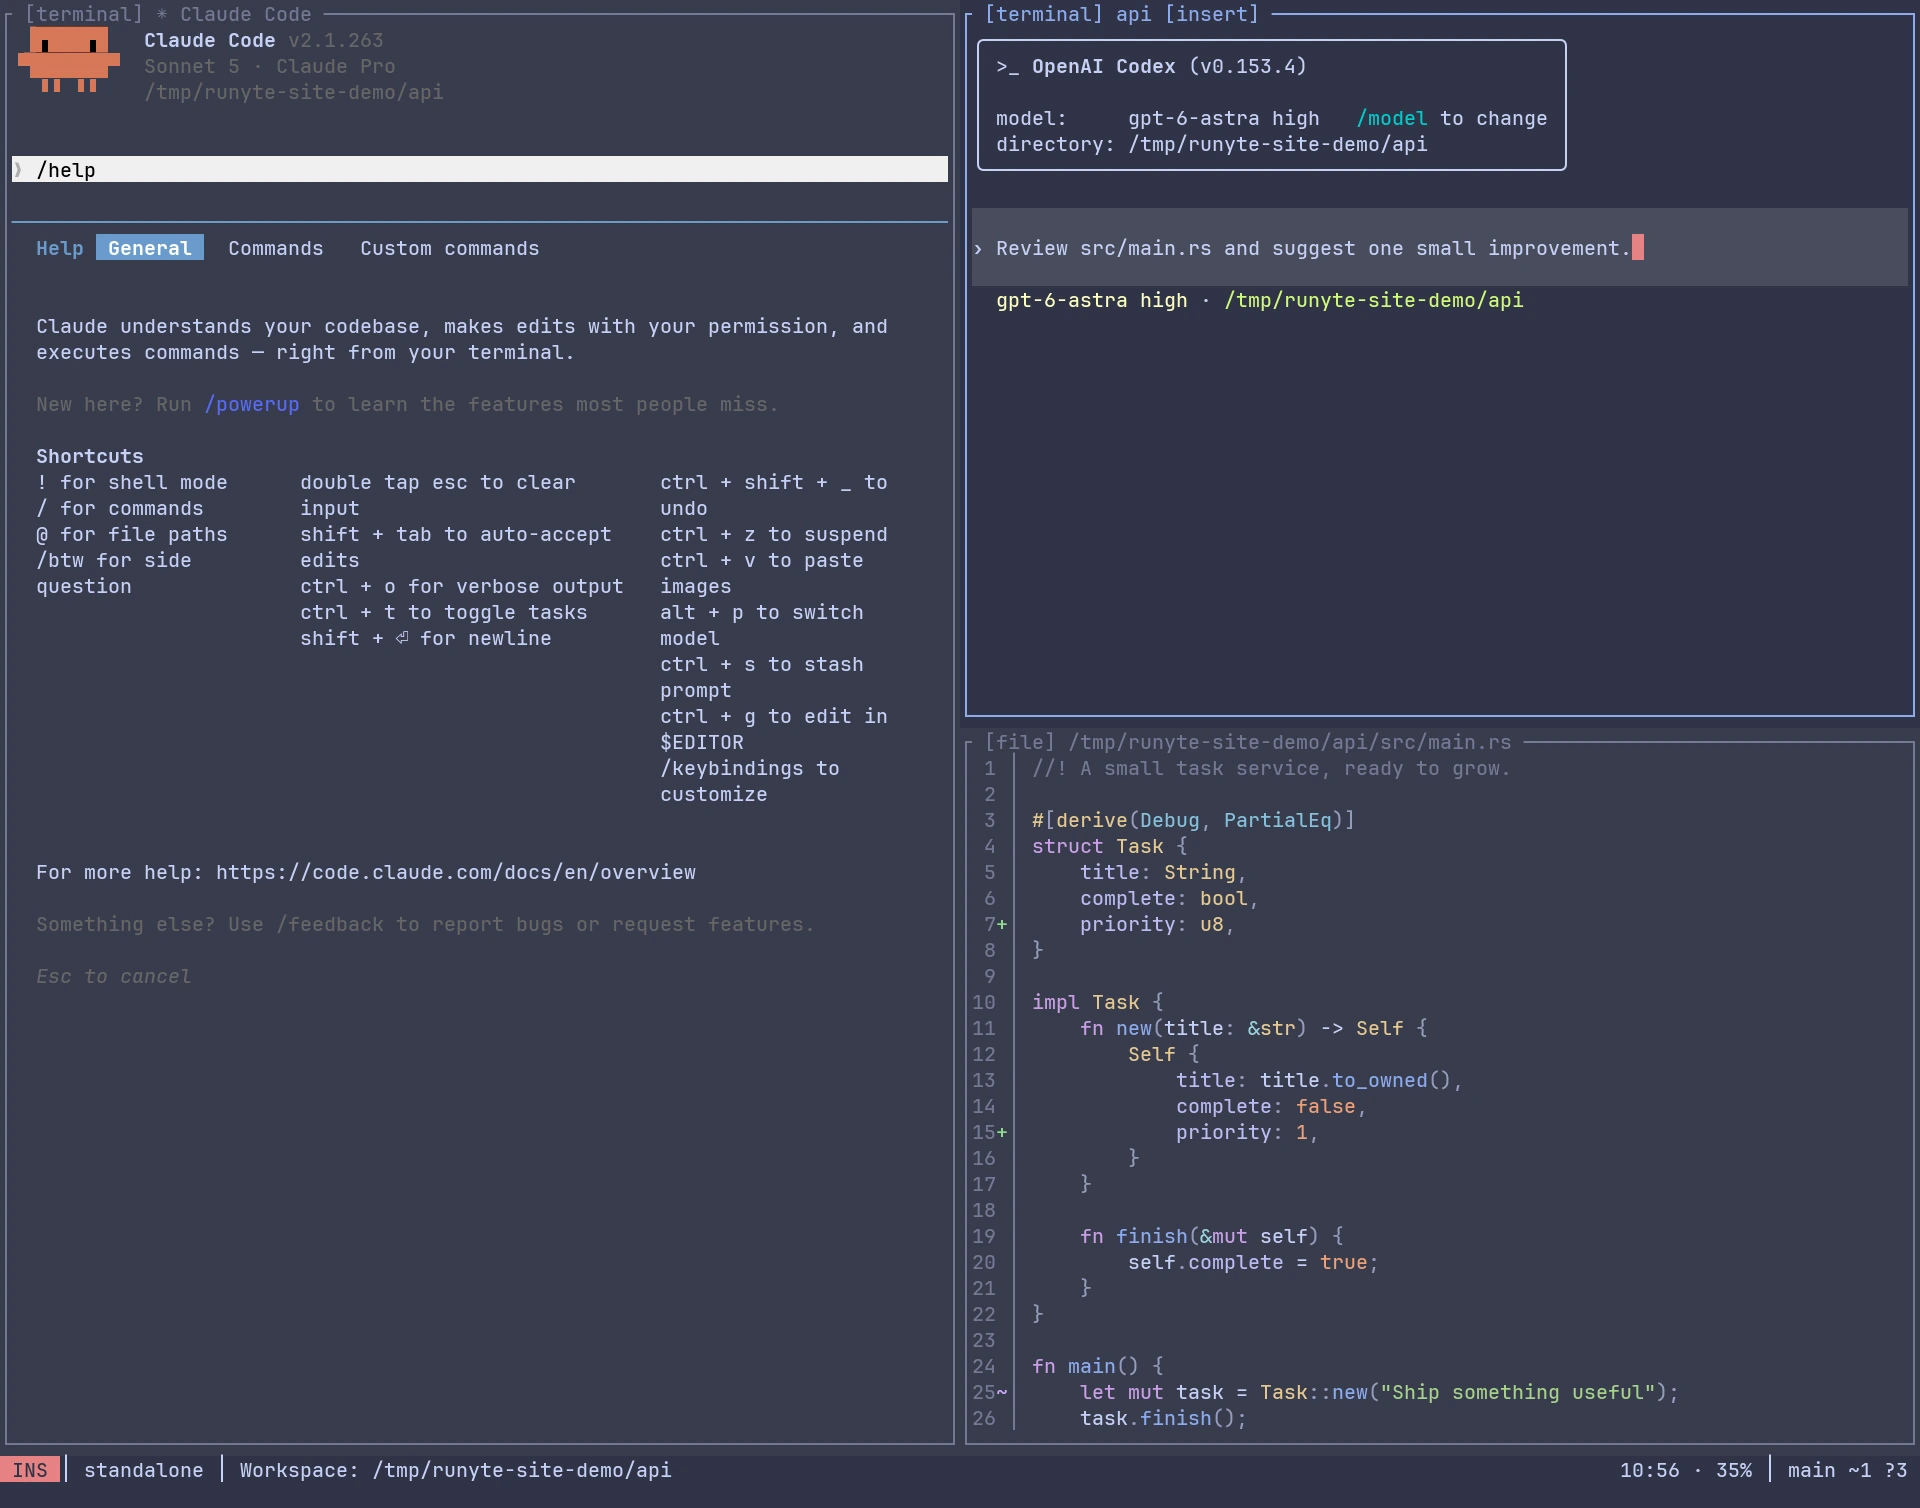
*Claude and Codex. Two terminals, one workspace. · frappe*
More examples are on the [screenshots page](https://runyte.com/screenshots/).
## Workspaces, panes, and navigation
When you start Runyte in a directory, this directory becomes your **workspace**.
All panes, open buffers, and terminal sessions belong to this workspace.
You can start a process in a terminal pane, then hide it and use that
pane for file editing. Use the **Navigator** (`Space n`) to browse open files
and terminals. You can also use the fuzzy **Finder** (`Space f`) to search
across the entire workspace including files, buffers, and terminals.
```text
Workspace
|
+-- Pane 1 ---- shows ----> Buffer A: src/main.rs
+-- Pane 2 ---- shows ----> Buffer A: same text, another view
+-- Pane 3 ---- shows ----> Terminal: shell, build, or coding agent
|
+-- Other open buffers and terminals, ready to switch to
```
Use `Space w ...` or `Ctrl-w ...` commands to manage panes. Move the active
pane to the left/bottom/top/right edge of the layout with `Ctrl-w H/J/K/L`.
With the mouse, drag shared borders to resize panes, Alt-left-drag inside a
pane to rearrange it, or Shift-Alt-left-drag to expand it into neighbouring
panes. See [pane management](docs/user-guide.md#pane-keys) for details.
Use `Space d t` to toggle a narrow directory tree at the left of the editor,
or `Space d d` to reveal the active file and focus the tree. Enter opens a
selected file directly, or asks for a numbered destination when several panes
are open. Expanded directories update automatically as files change outside
Runyte. `n`, `d`, `m`, and `r` create, delete, move, and rename entries; only
delete asks for confirmation. Use `gg`/`ge`/`G` to jump to the first/last row,
`.` to toggle dotfiles, `/` to search visible entry names, and `gw` to label
onscreen entries and jump to one. While the tree
is focused, `:q`, `:wc`, and `:close` hide it. `Tab` toggles the bottom legend. Drag the right
border to resize it, or set `editor.directory_tree_width` in `Space o o`.
## Terminals
Type `:terminal` (or `:t`), or press `Space t n` or `Ctrl-w t`, to start a
terminal in the current pane. A new terminal starts in Insert mode, where keys
go to the running program. Press `Ctrl-\` to switch to Normal mode: the output
keeps running, but keys go to Runyte. Press `Ctrl-\` again to review the
output. This freezes a snapshot of the output, which you can move around,
search with `s` or `/`, and copy with `y`. Press `i` to go back to Insert mode.
## Modes
Runyte runs in one of three modes, chosen by a flag or by the `mode` setting.
The status line names the one you are in.
| Mode | Start with | What you get |
| --- | --- | --- |
| `ide` (default) | `runyte` | A workspace: Git, language servers, MCP, plugins, and terminals. Quitting stops it. |
| `ide+mux` | `runyte --mux`, or `runyte -a` | The same workspace kept alive by a local **host** while a **client** provides the terminal interface, so you can detach, reattach, and switch between projects or Git worktrees. |
| `editor` | `runyte --editor`, or `runed` | Editing files and directories anywhere, with no workspace, Git, language servers, MCP, plugins, or terminals. |
`ide` and `ide+mux` need a workspace: a Git repository, or a directory you
initialized with `runyte --init DIRECTORY`. Outside one they say so instead of
starting.
Start Runyte in mux mode with:
```sh
runyte -a # attach to a session or start a new one
```
There are multiple ways to create a new session when you are already in Runyte:
- `Space Space` to open the session manager
- open the file explorer (`Space e`), navigate to another dir with `-` (go up) and `Enter` (go into) and press `Tab s` to start a new session in that dir
- open the integrated terminal, navigate to another dir and type `runyte -a` again
Switch between sessions with `Space Space`, or with `Shift-Left` and `Shift-Right`.
## Quick edits with runed
`runed` is Runyte in editor mode, whatever your configuration says. It edits a
file or browses a directory anywhere, writes nothing beside it, and the Finder
searches the directory you are in. The installer puts `runed` next to
`runyte`; after `cargo install`, add it yourself with
`ln -s runyte ~/.cargo/bin/runed`.
Runyte recognizes when it is launched as `runed`, so the symbolic link
(e.g. `ln -s /path/to/runyte runed`) alone is enough to select editor mode,
just like `runyte --editor`.
Use `runed` for standalone edits and with `sudoedit` for system files. To edit
inside an existing persistent session, use the [`--wait` setup](#post-install-setup).
```sh
export SUDO_EDITOR=runed
sudoedit /etc/fstab
```
## Plugins
Much of what Neovim users assemble from plugins comes built into Runyte:
language servers, Tree-sitter highlighting, Git integration, fuzzy finding,
a file manager, terminals, and completion. Plugins therefore have a different
job. They don't change how the editor behaves; they connect separate programs
that integrate closely with it, adding their own commands, panes, prompts, and
documents. A database browser, an SFTP client, or a task tracker, for example.
That makes Runyte plugins narrower than Neovim's. They currently can't draw
highlights or inline text in your buffers, react to what you type, provide
completions or language-server features, or run built-in commands.
Plugins can be written in **any programming language**. Each one is a program
you enable, and it talks to Runyte in JSON over stdin/stdout.
Official Runyte plugins are in development:
- [**ru-time**](https://github.com/runyte/ru-time) — a task list and time tracker with task notes.
- [**ru-dbviewer**](https://github.com/runyte/ru-dbviewer) — browse SQLite and PostgreSQL databases and run SQL from editor buffers.
Plugin commands start with `::` so they don't clash with built-in `:` commands,
for example `::time` in ru-time.
The repository includes examples to build on:
- [Uppercase selections](docs/plugins/uppercase.py), a minimal Python plugin.
- [Todo lists in Python, Rust, and C](docs/plugins/todo/README.md), plus an
independent [JavaScript example](docs/plugins/tasks.mjs).
- A [local file manager](docs/plugins/applications.md#local-file-manager),
[SFTP and FTP/FTPS browsers](docs/plugins/applications.md#sftp-browser-and-editor),
and a [local media controller](docs/plugins/applications.md#local-media-controller).
The stable plugin contract starts with Runyte 0.3.0. Start with the [installation and protocol guide](docs/plugins.md)
or the [application authoring guide](docs/plugins/authoring.md).
## Installation
Choose an edition above. [INSTALLATION.md](INSTALLATION.md) covers dependencies,
platform-specific instructions, source builds, shell setup and updates.
### Easy install
Install or update the **terminal edition** on Linux or macOS:
```sh
curl -fsSL https://raw.githubusercontent.com/runyte/runyte/main/install.sh | sh
```
The script verifies the release checksum and installs `runyte` and `runed` in
`~/.local/bin`, without sudo. Add that directory to `PATH` if needed. Linux
archives require glibc 2.35 or newer. For Windows, use the x86-64 ZIP from
[GitHub Releases](https://github.com/runyte/runyte/releases) and follow the
[Windows instructions](INSTALLATION.md#windows).
### Install through cargo
Install the **terminal edition** with Rust 1.88 or newer and a C compiler:
```sh
cargo install runyte --locked
```
### Desktop edition
Download the Linux **desktop** archive for your CPU from
[GitHub Releases](https://github.com/runyte/runyte/releases), then follow the
[desktop installation steps](INSTALLATION.md#desktop-edition). Linux desktop
archives require glibc 2.39 or newer and a working Vulkan driver. macOS desktop
builds are available as unsigned bundles built from source.
The desktop executable supports both frontends:
```sh
runyte --window --mux # window with a persistent session
runyte --mux # terminal frontend, same persistent sessions
```
### Build from source
After installing the [build dependencies](INSTALLATION.md#build-from-source),
choose the executable to build:
```sh
cargo build --release --locked # target/release/runyte
cargo build --release --locked -p runyte-desktop # target/release/runyte-desktop
```
Building does not install either executable. The [source installation
steps](INSTALLATION.md#install-a-source-build) explain how to install the desktop
build as `runyte`.
### Post-install setup
For Git and external-editor requests from Codex or Claude Code, set both
variables in `~/.bashrc` or `~/.zshrc`:
```sh
export EDITOR='runyte --wait'
export VISUAL='runyte --wait'
```
Start `runyte --mux` (or `runyte --window --mux`) in your project, then run the
agent in an integrated terminal. Its `Ctrl-g` edit opens in the parent
persistent session; `:wbc` saves and closes the buffer so the agent resumes.
Every client and host must use the same Runyte version. See [shell setup and
source-build paths](INSTALLATION.md#shell-and-external-editor-setup) for details,
Windows settings and optional `:quit-here` integration.
### First run
```sh
runyte --editor notes.md # edit anywhere, without a workspace
runyte --mux # open a persistent session in a project
```
A workspace is a Git repository or a directory initialized with
`runyte --init DIRECTORY`. Use `runyte --help` for all command-line options.
## Help
Key sequences show hints. `:tutorial` provides an
interactive introduction, `Space ?` opens contextual help, and `:help` opens
the complete manual.
- [User guide and command reference](docs/user-guide.md) (long; an AI agent can search it for you)
- [Frequently asked questions](docs/faq.md)
- [Configuration](docs/user-guide.md#configuration) and [example](config.example.yaml)
- [Language-server setup](docs/lsp/README.md)
- [Third-party notices](THIRD_PARTY_NOTICES.md)
## Contributing
Contributions are welcome in the form of:
- Feature requests and bug reports through [GitHub Issues](https://github.com/runyte/runyte/issues).
- [Plugin development](docs/plugins/authoring.md), in any programming language.
See the [contributing guide](CONTRIBUTING.md) for how to describe a feature
request, report a bug, or share a plugin.
## The name
Runyte is pronounced *“roon-ite”* and blends rune, byte, Rust, and unite `¯\_(ツ)_/¯`.
## Acknowledgements
Runyte's selection-first model and much of its keymap language come from
[Helix](https://helix-editor.com/); highlighting builds on
[tree-house](https://github.com/helix-editor/tree-house) and
[Tree-sitter](https://tree-sitter.github.io/). The interface uses
[Ratatui](https://ratatui.rs/), [Crossterm](https://github.com/crossterm-rs/crossterm),
and [Ropey](https://github.com/cessen/ropey).
The explorer follows ideas from [Oil.nvim](https://github.com/stevearc/oil.nvim),
and jump labels from [hop.nvim](https://github.com/smoka7/hop.nvim). See
[third-party notices](THIRD_PARTY_NOTICES.md) for the full credits and licenses.
## License
Runyte is licensed under the [Mozilla Public License 2.0](LICENSE).
Connection Info
You Might Also Like
No recommendations available